We research, compare, and evaluate every product we recommend, and only describe a pick as directly tested when that is specifically documented. As an Amazon Associate I earn from qualifying purchases. When you buy through our links we may earn a commission -- at no extra cost to you. Prices and availability verified May 13, 2026. Full disclosure.
That moment when you open your pantry and can actually find what you need? It's possible. Whether you're dealing with expired mystery cans, toppled cereal boxes, or that avalanche waiting to happen -- this guide will transform your pantry chaos into calm.
What You'll Need
Time needed: 2-4 hours | Difficulty: Easy
Required:
Recommended:
- Airtight pantry containers for dry staples
- Clear bins for snack and packet zones
- Shelf risers for cans and jars
- Lazy susans for oils, vinegars, and deep corners
Pro tip: Don't buy storage products until you've completed Steps 1-4!
Step 1: Empty Everything (Yes, Everything)
Take every single item out of your pantry. As you remove items, sort into four piles:
- Keep: Items you use regularly and aren't expired
- Toss: Expired items, stale food, broken seals
- Donate: Unopened, unexpired items you won't use
- Relocate: Items that don't belong in the pantry
Check Those Expiration Dates
- Spices: Lose potency after 2-3 years
- Flour: All-purpose 6-8 months
- Oils: Go rancid within 6-12 months of opening
- Baking powder/soda: 6-12 months
Step 2: Clean and Measure Your Space
Cleaning checklist:
- Wipe down all shelves
- Vacuum or sweep the floor
- Check for signs of pests
- Let everything dry completely
While it's empty, measure each shelf: width, depth, and height between shelves. Write these down for shopping!
Step 3: Categorize Your Items
Group similar items together:
- Baking supplies: Flour, sugar, baking soda, vanilla
- Grains & pasta: Rice, pasta, quinoa, oats
- Canned goods: Vegetables, beans, tomatoes, soups
- Snacks: Chips, crackers, granola bars, nuts
- Breakfast: Cereal, oatmeal, pancake mix
- Condiments & sauces: Oils, vinegars, hot sauce
Step 4: Create Your Layout Plan
The Zone System
Eye-level (prime real estate): Daily-use items like cereal, snacks, go-to condiments.
Below eye level: Frequently used items like canned goods, pasta, rice.
Low shelves: Heavy items, bulk items, backup stock.
High shelves: Rarely used items, seasonal items.
Door: Small, light items like spices and snack bars.
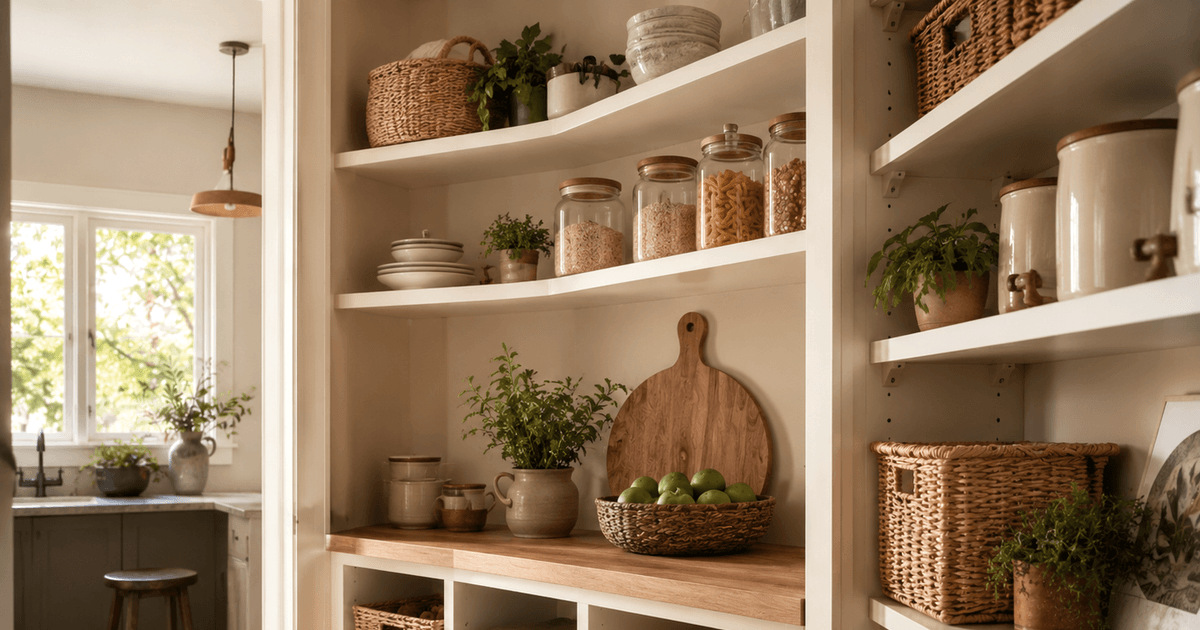
Step 5: Choose Your Storage Solutions
Worth the Investment
Airtight pantry storage containers for items that go stale (flour, sugar, cereal, crackers). They also prevent pantry moths.
Clear bins for grouping small items (snack bars, sauce packets, tea bags).
Lazy susans for deep shelves or corners. Spin to access instead of digging.
Shelf risers to double your shelf space and see items in back rows.
Step 6: Put Everything Back (Strategically)
- Put containers in first, then fill them
- Face labels forward for easy identification
- Leave some empty space (aim for 80% full max)
- Store like with like
- Put newer items in back (first in, first out)
Common Mistakes to Avoid
- Stacking cans more than 2-3 high
- Putting heavy items on door shelves
- Cramming everything in
- Hiding items behind other items
Step 7: Label Everything
Labels help everyone find AND return items to the right spot.
What to label:
- All decanted containers
- Bins by category ("Snacks," "Baking")
- Expiration dates on bulk items
Label maker recommendation: The Brother P-Touch creates clean, professional labels.
Maintaining Your Organized Pantry
Weekly (5 minutes)
- Quick visual scan
- Move items to front as things empty
- Toss anything expired
Monthly (15 minutes)
- Check expiration dates
- Wipe down shelves
- Assess if categories need reorganizing
Pantry Layouts by Household Type
A pantry for one person should not be organized the same way as a pantry for a family of five. The steps are the same, but the zones should match how food actually moves through the house.
Small Household or Apartment Pantry
Use fewer containers and tighter categories. One breakfast bin, one snack bin, one baking bin, and one dinner shelf may be enough. Avoid buying oversized container sets unless you cook in bulk; they can waste more space than they save in a small pantry.
Family Pantry
Create kid-accessible snack and lunch zones on a lower shelf. Keep bulk backstock higher or lower so the daily-use shelf does not become crowded. If multiple people unload groceries, labels become more important than matching containers.
Deep Shelf Pantry
Use pull-out bins for deep shelves instead of lining items front to back. Anything hidden behind two rows will eventually expire. Group by meal type or category so the entire bin can slide forward when you need it.
What Not to Decant
Decanting looks polished, but not every food belongs in a clear container. Keep items with short cooking instructions, allergen notes, or expiration details in original packaging unless you transfer that information to the label.
Do not decant foods your household rarely eats. A container full of an unpopular grain or snack can occupy prime shelf space for months. Decant the staples first: flour, sugar, rice, oats, cereal, pasta, and snacks that are eaten weekly.
How to Keep the Pantry From Sliding Back
Add a restock zone. A small bin for duplicates keeps backup pasta, sauce, cereal, and snacks from invading the daily-use shelves. When the daily container empties, refill from the restock bin before buying more.
Use a front-first rule for open packages. Open items should sit in front of sealed backups so the oldest food gets used first. This matters more than perfect labels and saves more money than another set of bins.
Make one shelf intentionally flexible. Pantry systems fail when every inch is assigned and there is nowhere to put party food, school snacks, holiday baking supplies, or temporary bulk buys. A flexible shelf keeps the rest of the system from breaking when life changes for a week.
Frequently Asked Questions
How long does it take to organize a pantry?
A typical pantry takes 2-4 hours. Larger walk-in pantries may take 4-6 hours.
Do I need to buy containers?
No! You can organize effectively with what you have. Containers help with freshness and aesthetics, but they're not required.
How do I organize a small pantry?
Use every vertical inch: shelf risers, door organizers, and stacking containers. Store backup items elsewhere.
How do I prevent pantry moths?
Store grains and flour in airtight containers. Freeze flour for 48 hours before storing. Keep pantry clean.
Your Organized Pantry Awaits
An organized pantry isn't about perfection -- it's about function. Start this weekend. Even if you only get through Step 1, you've made progress!
Questions? Drop us a message -- we love helping solve organization puzzles.
Happy organizing!